Saturday, May 5, 2012

Spiral Clasp - Wire Wrap Tips & Techniques

Here is how I made these spiral clasp when I first starting make wire cuff bracelets to add some fun! I would use silver plated German wire, less expensive to practice on. I use 20 gauge wire, you want your clasp to be sturdy. Instead of wasting materials I just straighten out some wire and leave the rest in a coil, but if you don't like working that way. I would cut about 6 inches of 20 gauge wire. If the end is not smooth. I take a cup bur to smooth the ends.
Take your pliers and the end of the wire and twist to make a circle.
You will have a small circle as picture shown
Take your flat nose pliers and hold firmly (take your left or right thumb depending if you right or left handed)as you push the wire forward to make a circle. Make as many circles as you like. I started out with 2 or 3. I do open circles but you can do yours how you like. Adjust how you hold your pliers to get the spiral you circles you want.
Once you are done with the circles, go half way past the circles.
Take your wire and push up, so that you have a slight "dip" shape
Now it is time to make your hook. Go down about an 1 inch to make the hook.
Bent wire over.
Cut 1 inch
Take your cup bur and round and smooth the end
I then hammer the end once I smooth the end
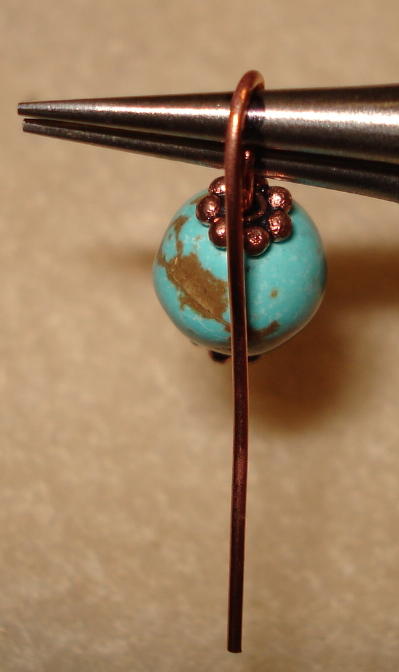
I then take the round nose pliers and make a small circle
I hammer the hook to harden the wire
I hammer different areas to give the some effects
Wah LA!!!

Friday, May 4, 2012

Wire Wrap Spiral - How To

I use 20 gauge wire or heavier. You can use any type of wire. Take the very end of your wire, grasp firmly and twist into a circle.
Take your flat nose pliers and hold the loop firmly. The other hand using your thumb, guide the wire close to make a circle.
I go around 3 to 5 times. You can go around as many times as you like.
Bend your wire at a 90 degree angle.
Cut excess wire.
After bending the wire cut then take pliers and twist to make a loop.
I have two photos below of wire spirals. To make the closed loop - Follow the Charm tutorial on other page

Thursday, May 3, 2012

Wire Wrap Charms -Beading Tips & Techniques

Here's a fun and easy way to turn a bead into a charm: wire wrap it with a head pin and pliers! If you are new at this, another easy way to keep your charms the same length is to mark your round nose pliers with a sharpie.
Slip your beads and/or findings onto the head pin.
Line your head pin with the sharpie mark you made
Then angle the head pin wire away from you in a 90 degree angle.
Flip the pliers upright and flip the head pin towards you and down.
Twist your hand with the pliers up so that the half loop is on the bottom. Take the head pin and push it away from you -should start to form a circle - make sure your wire is on the sharpie mark you made.
Slip your head pin either to a chain or clasp.
Keep a firm grip on the pliers in one hand - then take the head pin and come towards you as to wrap the lower half of the head pin closest to the pliers and work down toward the bead.
Continue to wrap until you reach the bottom. If you have excess head pin part you can cut it with wire cutters.

Left Over Candle Wax

I love to burn candles and I have burnt many kinds and brands. I have my few favorites and they are Yankee Candles and Virgina Candles- wood wicks. Virgina candles you do not have to melt the left over candle. The wick is wood or bamboo, and you only need to light it for 5 minutes and the room is filled with wonderful aroma of whatever fragrance you purchased. Lately with Yankee candles I have had to melt the rest of the wax. I have a separate pot that I use to melt the left over wax jar in. I put water accordingly so that it does not over flow. I also put a little water in the jar with the wax. I put it on med heat, and wait till the wax is melted.
If there is enough wax from multiple "jar" candles. I will combine them in one nice jar. I will have a wick long enough that I will tie to a pencil, so that the wick is centered in the jar. If there is not enough wax, I usually will have a small container that I put it in. Once the wax is melted I will pour it into the cup.
I have two drain traps - one for candles and one for everyday use. I remove my everyday use and put my candle drain trap. The drain trap catches your melted wax that dried. Wax down the drain is not good.
I take the jar with caution, and put hot tap water in it with soap. I use a mirco fiber towel and wash the inside of the jar until the wax residue is gone, if there is any. While the wax was being melted it should have softened the label.
Once you remove the label you will need to remove the bottom label as well.
If you get a film residue from the label, I put soap on it and scrub. If that does not work I use a brillo pad in a circular motion to remove the residue. I rinse clean.
Brillo pad removes the residue
Once your done this is what your jars should look like
If I do not use the jars I recycle them. Most of my unique jars come from candles, and I use those as my neat bead jars!

Saturday, October 8, 2011

Dazzling your center piece

My Mother-in-Law gave me these beautiful candles with the candle holder. I wanted to "Dazzle" them up. Here is what they looked like before I added and "Bling" to them.

I wire wrapped filigree brass beads and glass pearl beads every so often to accent the center piece. Fun but simple project.


Picture of both side done. To accent the piece I had a dragonfly pin that was not working right, so I added it to the design.


Close up of the dragonfly...

Monday, August 22, 2011

Vintage "Look" Christmas Tree

Vintage Christmas Tree from vintage broken jewelry
August 22, 2011


I have made one of these in the past, not sure where it is. I might have given it away.

I love vintage jewelry, and collect the ones that I like. However, I find deals where you buy bags of vintage jewelry for $2.00. You might be lucky and have a few nice whole pieces of jewelry. I pick out the ones that are not broken and put them aside in a nice box. The broken pieces stay in the bag for future use.

I decided to make another Vintage Christmas Tree. I had gotten the Paper cone from Micheal's some time back, as you see there are two bottom stands. I two stands as you see. The one that is still wrapped, that is the top of a fence post the other one is a ceramic candle base I got this past week from my Mother-In-Law. I use that instead.


I had some old glass garlands that I never used they are about 20 years old, and look vintage. I used them as the back drop for the tree, and built up from there by adding broken pieces of vintage jewelry in the spaces. I used a hot glue gun with glue to secure the pieces.

This is what it looks like right now. I still have to fill in the spaces. I ran out of broken pieces of jewelry... Once it is completely done I will post the photo. My Mom is always looking out for vintage jewelry bargains in a bag!! =]

This make a wonderful center piece, and you still have time to make it for the Holidays!! Have fun!!


Thursday, January 13, 2011

Rectangular & Oval "Tree of Life"

Tree of Life - Rectangular shape and Oval shape "Tree of Life"

My husband and I came up with the rectangular and oval shape for the "Tree of Life" on October 13th, 2010. We sat for many hours trying to write instruction for both designs for my class I am teaching at - The Bead Place at Fairview Heights, IL - Here is what it looks like.


All instructions and photos are by: Chou & Jeff Campbell

Oval "Tree of Life"


Rectangular "Tree of Life"